Calibration tutorial
New experiment:
For a new set of experiments open a new folder. The file should contai the following sub-folders:
cal: for calibration,parameters,imgandres. For example, a clean file for example (copy it and rename the file) is inptv/fresh_test.
Calibration files:
The
calfolder contains: calibration images, one for each camera, e.g.cam1.tif,cam2.tifand so on, orientation filescam1.ori,cam2.ori…, and acalblock.txtfile that contains the x,y,z coordinates of the calibration target.orifiles: camera’s orientation files:10.0 10.0 300.0 0.01 0.05 0.0002 1.0 0.0 0.0 0.0 1.0 0.0 0.0 0.0 1.0 0.0 0.0 80.0 0.0001 0.0001 100.0000
First row: x,y,z of the camera sensor from the calibration target origin (0,0,0)
Second row: the angles [radians], the first is around
xaxis, thenyaxis and the third is the angle of rotation aroundzdirection which coincides with the imaging axis of the camera (the line that connects the sensor and the target)The next three rows is the rotation matrix
next 2 parameters are the
xp,yppositions of the pinhole in respect to the image center in millimeters. if the camera imaging axis is at 90 deg. to the sensor, thenxp=yp=0.0.Next parameter is the back-focal distance, typically called
f. For example, if we have a ratio of world image to chip image of 500 mm to 65 mm (384 pixels is therefore corresponding to 17 microns), e.g. 1:8. The distance from lens to calibration target is about 800 mm. Hence the focal distance is about 100 mm.Last row with the 3 parameters is the the position of the glass in respect to to the origin and in the coordinate system of the calibration target (
xis typically from left to right,yis from bottom to top andzis by definition the positive direction looking at the camera. so if the glass wall is perpendicular to the imaging axis and parallel to the calibration target, and the distance in water is about 100 mm the last row is0.0 0.0 100.0. Since division by zero is not recommended we sugest to use a very tiny deviation from0.0, e.g.0.0001
Calibration best practice:
In the first run- choose reasonable parameters according to the cameras positions in the experiment.
Gain 4 calibration pictures, one for each camera, and copy them to the cal file.
right click on the current run. choose calibration parameters:
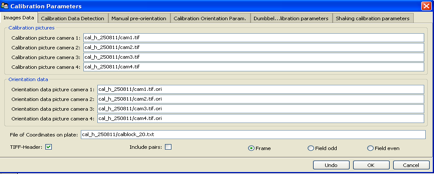
Image data:
Fill in the name of the four calibration pictures ,four orientation data pictures and file of coordinates on plate.
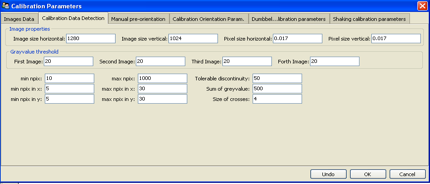
Calibration data detection:
Different parameters in order to detect the dots on the calibration target.
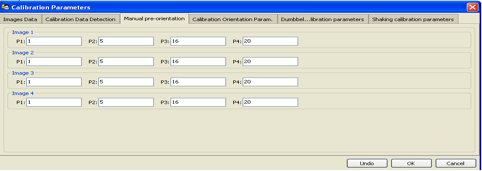
Manual pre-orientation:
Fill in the numbers of four points on the calibration target. The numbers should be set as chosen in manual orientation.
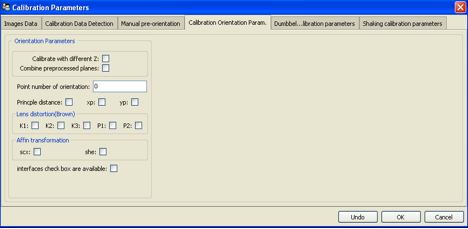
Calibration orientation parameters:
The lens distortion is modeled with up to five parameters :k1,k2,k3+ p1,p2
Affin transformation: scx, she
Principle distance: xp, yp
In the first calibration process don’t mark those parameters. After establishing the calibration, the different parameters can be marked in order to improve the calibration.
In the upper toolbar choose : calibration and create calibration
load/show images*: shows the calibration images
detection: detect the calibration dots on the calibration image. check that all the dots were identified correctly and marked in blue, and that there aren’t any extra dots.
mark the four points from the manual pre-orientation in each camera and press manual orient. This creates the man_ori.dat. Next time, skip this stage and press detection and then orient with file.
show initial guess: The yellow dots show where the dots from the calibration plane would end up on your images if the initial guess would be correct.
If the yellow dots aren’t in the right location, change the ori files - edit ori files and press show initial guess again to see the change, do it until the yellow and blue dots match.
Check that the position of each camera according to the ori files is also reasonable according to the cameras position in reality.
sort grid: situates all the dots in their positions. Check that all dots were found and marked correctly.
orientation: creates the orientation.
In order to improve the orientation : mark some of the Calibration orientation parameters and press orientation again.